Why Business Analysis is a Hot Career Choice and How to Get Started

In today’s fast-paced and ever-changing business world, the role of a business analyst has become increasingly vital. With the rise of big data, digital transformation, and the need for effective decision-making, companies are seeking skilled professionals who can analyze complex information and provide strategic recommendations. As a result, business analysis has emerged as a hot career choice for those looking to enter the field of business. In this article, we’ll explore the reasons why business analysis is in high demand and provide tips on how to get started in this exciting and lucrative career path. Whether you’re a recent graduate or a seasoned professional looking for a change, this guide will help you understand the skills and knowledge required for success in this field and provide actionable steps to take your career to the next level. So, let’s dive in and explore the world of business analysis!

Business Analysis
Business Analysis

High Demand for Business Analysts

Another reason for the high demand for business analysts is the need for companies to stay competitive in today’s digital age. As technology advances, businesses must incorporate new tools and systems to remain relevant and effective. Business analysts play a vital role in this process, as they are responsible for identifying the best tools and systems to help companies achieve their goals. By leveraging their knowledge of business processes and technology, business analysts can help companies streamline their workflows and improve their overall efficiency.br/>

Finally, the rise of e-commerce and online business has created new opportunities for business analysts. E-commerce companies generate vast amounts of data that can be analyzed to improve customer experiences, optimize sales, and identify new revenue streams. As e-commerce continues to grow, so too will the demand for skilled business analysts who can help companies navigate this complex and ever-changing landscape.br/>br/>

Skills Required for a Business Analysis Career

While there are many different types of business analysts, there are several core skills that are essential for success in this field. First and foremost, business analysts must have excellent analytical skills. They should be able to analyze complex data sets, identify patterns and trends, and draw meaningful insights from this information. Additionally, business analysts must be able to communicate these insights effectively to stakeholders, including executives, managers, and other team members.br/>

Another essential skill for business analysts is the ability to understand business processes and systems. Business analysts must be able to identify areas where processes can be improved, and they should be able to recommend solutions that can help businesses achieve their goals. Finally, business analysts must be able to work collaboratively with others, as they often work as part of a team to achieve common objectives.br/>

Other valuable skills for business analysts include project management, problem-solving, and critical thinking. Business analysts should also be comfortable working with technology, including software and hardware systems used in business operations.br/>br/>

Steps to Becoming a Business Analyst

If you’re interested in pursuing a career in business analysis, there are several steps you can take to get started. First, you should consider getting a degree in a related field, such as business administration, finance, or information technology. While a degree is not always required for entry-level positions, it can help you stand out from other candidates and provide a solid foundation in the skills and knowledge required for success in this field.br/>

Next, you should consider getting certified as a business analyst. There are several different certifications available, including the Certified Business Analysis Professional (CBAP) and the Certification of Competency in Business Analysis (CCBA). These certifications demonstrate your knowledge and expertise in business analysis and can help you advance in your career.br/>

Another way to gain experience in business analysis is to seek out internships or entry-level positions in the field. These positions can provide valuable hands-on experience and allow you to build your skills and knowledge in a real-world setting. Additionally, you can seek out opportunities to work on projects or initiatives within your current organization that involve business analysis.br/>

Finally, it’s essential to continue learning and growing in your career as a business analyst. This can include attending conferences and workshops, participating in industry associations, and seeking out mentorship opportunities.br/>br/>

Education and Certification for Business Analysts

While a degree is not always required for entry-level positions in business analysis, having a solid educational foundation can be beneficial for advancing in your career. Many business analysts have degrees in related fields, such as business administration, finance, or information technology. These degrees provide a strong foundation in the skills and knowledge required for success in business analysis, including data analysis, project management, and business process improvement.br/>

Additionally, there are several certification options available for business analysts. These certifications demonstrate your knowledge and expertise in business analysis and can help you advance in your career. The International Institute of Business Analysis (IIBA) offers several certification options, including the Certification of Competency in Business Analysis (CCBA) and the Certified Business Analysis Professional (CBAP). These certifications require a combination of education, experience, and passing a certification exam.br/>br/>

Tools and Techniques Used by Business Analysts

Business analysts use a variety of tools and techniques to analyze data and provide strategic recommendations to their organizations. Some of the most common tools and techniques used by business analysts include:br/>

– **Data analysis software:** Business analysts use software tools such as Excel, SQL, or Tableau to analyze data sets and extract meaningful insights. These tools allow business analysts to identify patterns, trends, and correlations in data that can inform strategic decision-making.br/>

– **Process modeling tools:** Business analysts use process modeling tools such as BPMN or UML to document and visualize business processes. These tools allow business analysts to identify areas where processes can be improved and recommend solutions to streamline workflows.br/>

– **Requirements gathering techniques:** Business analysts use a variety of techniques to gather requirements from stakeholders, including interviews, surveys, and workshops. These techniques help business analysts understand the needs and goals of their organizations and ensure that solutions are aligned with these objectives.br/>br/>

Career Opportunities for Business Analysts

Business analysis is a versatile and in-demand profession, with many different career paths available. Some of the most common career paths for business analysts include:br/>

– **Business systems analyst:** Business systems analysts work with stakeholders to identify business requirements and design solutions that meet these needs. They may also be responsible for managing projects and ensuring that solutions are implemented effectively.br/>

– **Data analyst:** Data analysts specialize in analyzing large data sets and extracting insights that can inform business decisions. They may also be responsible for developing data models, creating dashboards and reports, and ensuring data accuracy and integrity.br/>

– **Process analyst:** Process analysts specialize in analyzing business processes and identifying areas where improvements can be made. They may also be responsible for designing and implementing process improvements and measuring the effectiveness of these changes.br/>

– **Business intelligence analyst:** Business intelligence analysts specialize in analyzing data to inform strategic decision-making. They may be responsible for creating dashboards and reports, developing data models, and identifying trends and insights that can drive business decisions.br/>br/>

Salaries and Benefits for Business Analysts

Business analysts are highly skilled professionals, and as such, they can command competitive salaries and benefits. According to the Bureau of Labor Statistics, the median annual salary for management analysts, which includes business analysts, is $87,660. However, salaries can vary widely depending on the industry, location, and level of experience.br/>

In addition to competitive salaries, many business analysts enjoy a range of benefits, including health insurance, retirement plans, and paid time off. Some companies may also offer bonuses or profit-sharing programs based on performance.br/>br/>

Challenges Faced by Business Analysts

While business analysis can be a rewarding and lucrative career path, it’s not without its challenges. One of the most significant challenges faced by business analysts is the need to balance competing priorities and demands. Business analysts must be able to manage their time effectively and prioritize tasks to ensure that they are meeting the needs of their organizations.br/>

Another challenge faced by business analysts is the need to communicate complex information effectively to stakeholders. Business analysts must be able to translate technical information into language that is understandable and actionable for executives, managers, and other team members.br/>

Finally, business analysts must be able to adapt to changing technologies and business processes. As business needs evolve, business analysts must be able to stay up-to-date with the latest tools, techniques, and trends in their field.br/>br/>

Conclusion

Business analysis is an exciting and in-demand career path that offers many opportunities for growth and advancement. With the right skills and knowledge, you can become a valuable asset to your organization and help drive strategic decision-making. By following the steps outlined in this guide, you can get started on a path to success in business analysis and take your career to the next level. Whether you’re a recent graduate or a seasoned professional, there has never been a better time to pursue a career in business analysis.

Business analyst role and responsibilities in Agile

Business Analyst Roles and Responsibilities , job description and duties

How to Conduct Effective UAT to Ensure Customer Satisfaction

How to Conduct Effective UAT to Ensure Customer Satisfaction

User Acceptance Testing (UAT) is a crucial step in the software development lifecycle that ensures the final product meets the customer’s requirements. It’s a process of verifying the functionality, usability, and performance of a software application. However, conducting User Acceptance Testing can be a daunting task, especially when it comes to ensuring customer satisfaction. As a highly skilled assistant specializing in digital marketing, I have seen firsthand the importance of effective User Acceptance Testing in delivering a successful product. In this article, I will share some tips on how to conduct effective User Acceptance Testing to ensure customer satisfaction. From defining the scope of User Acceptance Testing to involving the right stakeholders, I will guide you through the process of conducting User Acceptance Testing that is both efficient and effective. So, whether you’re a product owner or a QA tester, read on to learn how to conduct UAT that meets your customers’ needs and expectations.

UAT

Topics Covered :

  1. What is User Acceptance Testing (UAT)?

  2. The importance of UAT in software development

  3. UAT process and steps

  4. How to prepare for UAT

  5. Creating effective UAT test cases

  6. UAT execution and tracking

  7. UAT best practices

  8. Common UAT challenges and how to overcome them

  9. Tools for UAT

  10. Conclusion

What is User Acceptance Testing (UAT)?

Before diving into the process of User Acceptance Testing, it’s essential to understand what it is. User Acceptance Testing is the process of testing a software application by its intended users to determine if it meets the specified requirements. In other words, User Acceptance Testing is a customer-centric testing process that ensures the application works as expected and satisfies the user’s needs. User Acceptance Testing is typically the last testing phase in the software development lifecycle before the application goes live.

User Acceptance Testing is a critical step in the software development lifecycle because it ensures the final product meets the customer’s expectations. It helps to identify any defects or issues that may affect the usability, functionality, or performance of the application. User Acceptance Testing is also an opportunity to get feedback from the customers and make any necessary changes before releasing the product to the market.

User Acceptance Testing is a collaborative effort between the development team, quality assurance team, and the customer. It’s essential to involve the customer in the User Acceptance Testing process to ensure the product meets their needs and expectations.

The importance of UAT in software development

As mentioned earlier, User Acceptance Testing is a crucial step in the software development lifecycle. It ensures the final product meets the customer’s requirements, and it is essential for the following reasons:

### 1. Ensures customer satisfaction

The primary goal of User Acceptance Testing is to ensure customer satisfaction. It helps to identify any defects or issues that may affect the usability, functionality, or performance of the application. By involving the customer in the User Acceptance Testing process, you can ensure that the product meets their needs and expectations.

### 2. Reduces the risk of defects

User Acceptance Testing helps to identify any defects or issues before the application goes live. Identifying and fixing defects early in the development process can save time and money in the long run. User Acceptance Testing helps to reduce the risk of defects in the final product.

### 3. Improves the quality of the product

User Acceptance Testing helps to improve the quality of the product by identifying any issues or defects that may affect the usability, functionality, or performance of the application. By fixing these issues, you can improve the overall quality of the product.

### 4. Increases customer confidence

By involving the customer in the User Acceptance Testing process, you can increase their confidence in the product. It shows that you value their input and are committed to delivering a product that meets their needs and expectations.

UAT process and steps

The User Acceptance Testing process can vary depending on the organization and the project’s scope. However, the following are the general steps involved in the UAT process:

### 1. Define the scope of UAT

The first step in the User Acceptance Testing process is to define the scope of User Acceptance Testing. It’s essential to identify which features of the application will be tested, what the acceptance criteria are, and who will be involved in the testing. Clearly defining the scope of User Acceptance Testing will ensure that everyone involved in the process understands what to expect.

### 2. Prepare for UAT

Preparing for User Acceptance Testing involves setting up the testing environment, identifying the testing tools required, and preparing the test cases. It’s essential to ensure that the testing environment is similar to the production environment to get accurate results.

### 3. Create UAT test cases

Creating effective User Acceptance Testing test cases is essential for the success of User Acceptance Testing. The test cases should be based on the acceptance criteria and cover all the features of the application. It’s important to involve the customer in creating the test cases to ensure that they reflect their needs and expectations.

### 4. UAT execution and tracking

During the User Acceptance Testing execution phase, the testers will run the test cases and identify any defects or issues. It’s essential to track the defects and issues and prioritize them based on their severity. The development team should fix the defects, and the testers should retest the application to ensure that the issues have been resolved.

### 5. UAT sign-off

The UAT sign-off phase involves the customer signing off on the product’s final version. It’s essential to ensure that the customer is satisfied with the product before signing off on it. Once the sign-off is obtained, the application is ready to go live.

How to prepare for UAT

Preparing for UAT is a crucial step in ensuring the success of User Acceptance Testing. The following are some tips on how to prepare for User Acceptance Testing:

### 1. Set up the testing environment

It’s essential to set up the testing environment to ensure that it’s similar to the production environment. This will ensure that the testing results are accurate and reliable.

### 2. Identify the testing tools required

Identifying the testing tools required is essential for the success of User Acceptance Testing. There are many testing tools available in the market, and it’s essential to choose the right tools based on the project’s requirements.

### 3. Prepare the test data

Preparing the test data is essential for the success of User Acceptance Testing. The test data should be based on the acceptance criteria and reflect the customer’s needs and expectations.

Creating effective UAT test cases

Creating effective UAT test cases is essential for the success of User Acceptance Testing. The following are some tips on how to create effective UAT test cases:

### 1. Involve the customer

It’s essential to involve the customer in creating the test cases to ensure that they reflect their needs and expectations.

### 2. Base the test cases on acceptance criteria

The test cases should be based on the acceptance criteria and cover all the features of the application.

### 3. Ensure test cases are clear and concise

The test cases should be clear and concise to ensure that the testers understand what to test and how to test it.

UAT execution and tracking

User Acceptance Testing execution and tracking are crucial for the success of UAT. The following are some tips on how to execute UAT and track the results:

### 1. Identify defects and issues

During the User Acceptance Testing execution phase, the testers should identify any defects or issues. It’s essential to prioritize the defects based on their severity.

### 2. Fix defects

The development team should fix the defects identified during the UAT execution phase.

### 3. Retest the application

The testers should retest the application after the defects have been fixed to ensure that the issues have been resolved.

UAT best practices

The following are some User Acceptance Testing best practices that can help ensure the success of UAT:

### 1. Involve the customer in the UAT process

Involving the customer in the User Acceptance Testing process is essential for ensuring customer satisfaction.

### 2. Define the scope of UAT

Defining the scope of User Acceptance Testing is essential for ensuring that everyone involved in the process understands what to expect.

### 3. Prepare for UAT

Preparing for User Acceptance Testing involves setting up the testing environment, identifying the testing tools required, and preparing the test cases.

### 4. Create effective UAT test cases

Creating effective UAT test cases is essential for the success of UAT.

### 5. Execute UAT and track the results

Executing User Acceptance Testing and tracking the results are crucial for the success of User Acceptance Testing.

Common User Acceptance Testing challenges and how to overcome them

The following are some common UAT challenges and how to overcome them:

### 1. Lack of customer involvement

Lack of customer involvement can lead to a product that does not meet the customer’s needs and expectations. It’s essential to involve the customer in the User Acceptance Testing process to ensure customer satisfaction.

### 2. Poorly defined scope

Poorly defined scope can lead to confusion and misunderstandings. It’s essential to define the scope of UAT to ensure that everyone involved in the process understands what to expect.

### 3. Limited testing time

Limited testing time can lead to incomplete testing and missed defects. It’s essential to allocate enough time for User Acceptance Testing to ensure that all the features of the application are tested thoroughly.

Tools for UAT

There are many UAT tools available in the market. The following are some of the popular UAT tools:

### 1. Selenium

Selenium is an open-source UAT tool that automates web browsers.

### 2. TestRail

TestRail is a web-based UAT management tool that helps manage test cases, track results, and generate reports.

### 3. JIRA

JIRA is a project management tool that includes UAT management capabilities.

Conclusion

In conclusion, UAT is a critical step in the software development lifecycle that ensures the final product meets the customer’s requirements. By following the tips outlined in this article, you can conduct effective User Acceptance Testing that ensures customer satisfaction. From defining the scope of User Acceptance Testing to involving the right stakeholders, preparing for User Acceptance Testing, creating effective User Acceptance Testing test cases, executing User Acceptance Testing and tracking the results, and overcoming common User Acceptance Testing challenges, these best practices will ensure the success of User Acceptance Testing. Remember to involve the customer in the User Acceptance Testing process, and use the right tools to get the best results.

What is uat environment in software development?

What is uat testing in software development?

What is UAT (User Acceptance Test)?

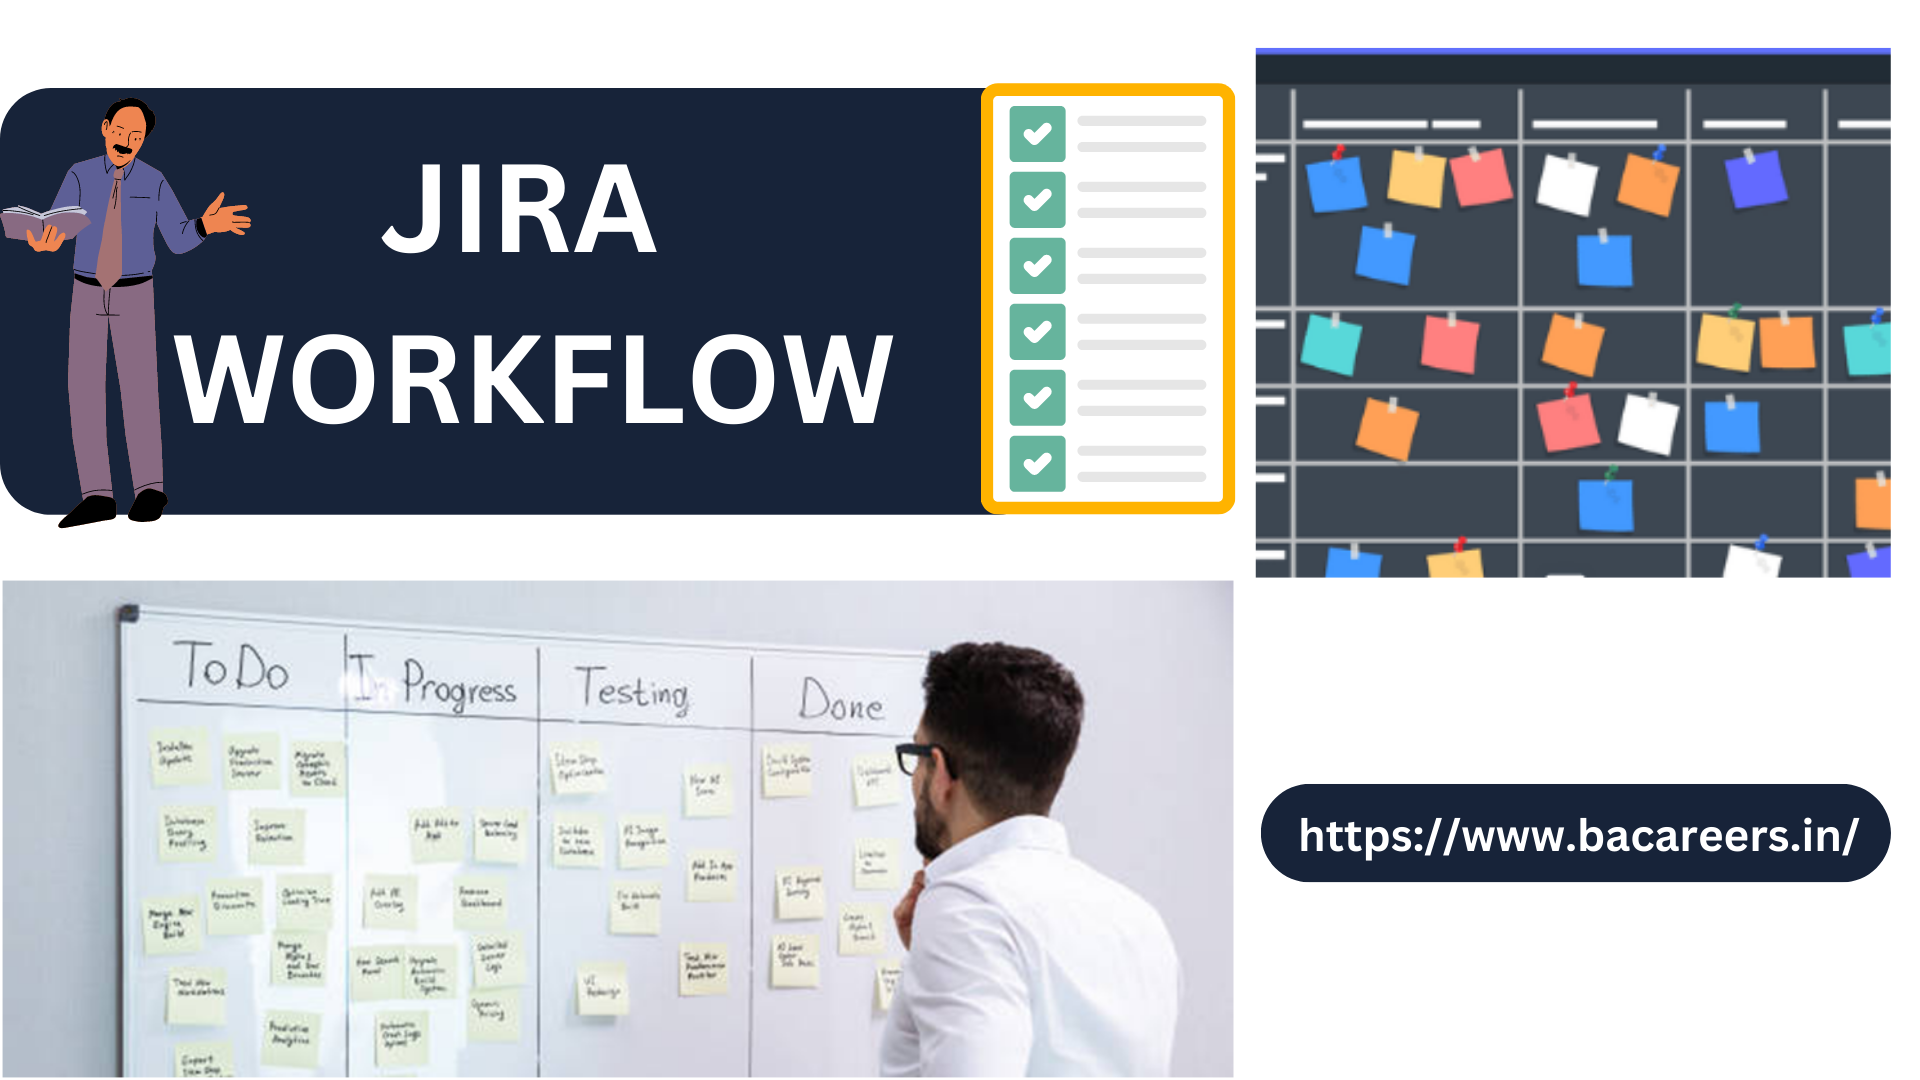
Jira Workflow: The Key to Agile Project Management

Jira Workflow: The Key to Agile Project Management

In today’s fast-paced business world, companies are constantly looking to optimize their project management processes. Many have turned to Agile methodologies to help them achieve greater efficiency, faster delivery times, and better quality outcomes. One essential tool for Agile project management is Jira Workflow. Jira Workflow is a powerful workflow engine that enables teams to collaborate, track progress, and manage their work in a seamless and efficient manner. It allows teams to customize workflows to their specific needs, ensuring that every task is completed in the correct order, and nothing falls through the cracks. In this article, we’ll explore Jira Workflow and its key features, and discuss how it can help your team achieve greater success in your Agile projects. So, whether you’re new to Agile project management or a seasoned pro, read on to discover how Jira Workflow can help you take your project management to the next level.

Topics Covered :

  1. Understanding Agile Project Management
  2. Benefits of Jira Workflow in Agile Project Management
  3. Getting Started with Jira Workflow
  4. Customizing Jira Workflow for your project
  5. Jira Workflow Best Practices
  6. Advanced Jira Workflow Features
  7. Jira Workflow Integration with other tools
  8. Jira Workflow Reporting and Analytics
  9. Conclusion

jira workflow
jira workflow

Understanding Agile Project Management

Agile project management is a flexible and iterative approach to project management. Instead of following a rigid step-by-step process, Agile teams work in short iterations, constantly testing and refining their solutions. This approach allows teams to respond quickly to changing requirements, deliver high-quality products, and improve collaboration among team members.

Agile methodology is well-suited to software development, as it allows teams to create software that meets the ever-changing needs of customers. However, Agile is also used in many other industries, such as marketing, healthcare, and finance.

Benefits of Jira Workflow in Agile Project Management

Jira Workflow is a powerful tool that can help Agile teams achieve their goals. Here are some of the benefits of using Jira Workflow in Agile project management:

### Collaborative Work Management

Jira Workflow enables teams to work collaboratively on projects. Team members can create, assign, and track tasks in real-time, ensuring that everyone is on the same page. Jira Workflow also allows team members to comment on tasks, share files, and communicate with each other easily.

### Customizable Workflows

JiraWorkflow allows teams to customize workflows to their specific needs. This means that teams can create workflows that reflect their unique processes and workflows. Customizable workflows ensure that every task is completed in the correct order and nothing falls through the cracks.

### Real-time Tracking and Reporting

JiraWorkflow provides real-time tracking and reporting features that allow teams to monitor progress and identify issues quickly. Teams can create custom reports to track progress, identify bottlenecks, and analyze performance.

### Integration with Other Tools

JiraWorkflow integrates with a wide range of tools, including Confluence, Bitbucket, and Trello. This allows teams to manage their projects in a single platform, eliminating the need for multiple tools.

Getting Started with Jira Workflow

Getting started with JiraWorkflow is relatively easy. Here are the steps you need to follow:

### Step 1: Create a Jira Account

To use JiraWorkflow, you need to create a Jira account. You can create an account for free on the Atlassian website.

### Step 2: Create a Project

Once you have created your Jira account, you need to create a project. To create a project, click on the “Create Project” button on the Jira dashboard.

### Step 3: Create a Workflow

After creating a project, you need to create a workflow. To create a workflow, click on the “Workflows” tab and select “Add Workflow”. You can then customize the workflow to meet your specific needs.

### Step 4: Create Issues

After creating a workflow, you can start creating issues. To create an issue, click on the “Create” button and select the issue type you want to create. You can then assign the issue to a team member and track its progress.

Customizing Jira Workflow for your project

One of the key benefits of JiraWorkflow is its customizability. Here are some tips for customizing Jira Workflow for your project:

### Understand Your Team’s Workflow

Before customizing JiraWorkflow, it’s important to understand your team’s workflow. This will help you create a workflow that reflects your team’s unique processes and workflows.

### Keep it Simple

When customizing JiraWorkflow, it’s important to keep it simple. Avoid creating too many steps in the workflow, as this can make it difficult for team members to understand and follow.

### Use Automation

JiraWorkflow allows you to automate many tasks, such as sending notifications and updating issue statuses. This can help save time and improve efficiency.

### Test Your Workflow

Before deploying your custom workflow, it’s important to test it thoroughly. This will ensure that it works as expected and meets your team’s needs.

Jira Workflow Best Practices

Here are some best practices for using Jira Workflow:

### Keep Your Workflow Simple

As mentioned earlier, it’s important to keep your workflow simple. Avoid creating too many steps in the workflow, as this can make it difficult for team members to follow.

### Use Descriptive Issue Types

When creating issues in JiraWorkflow, use descriptive issue types. This will help team members understand the issue and its priority.

### Assign Issues to Team Members

Assigning issues to team members is essential for effective collaboration. This ensures that team members know what tasks they are responsible for and can track their progress.

### Use Labels and Filters

JiraWorkflow allows you to use labels and filters to organize your issues. Using labels and filters can help you identify issues quickly and improve collaboration among team members.

Advanced Jira Workflow Features

In addition to its core features, JiraWorkflow also offers several advanced features. Here are some of the most useful advanced features:

### Conditions

JiraWorkflow allows you to create conditions that must be met before an issue can transition to the next status. This can help ensure that issues are completed correctly and in the correct order.

### Validators

Validators ensure that the required fields are completed before an issue can be transitioned to the next status. This can help improve the quality of work and reduce errors.

### Post Functions

Post functions are actions that occur after an issue has been transitioned to the next status. Post functions can be used to send notifications, update fields, and perform other actions.

Jira Workflow Integration with other tools

JiraWorkflow integrates with a wide range of tools, including Confluence, Bitbucket, and Trello. Here are some of the benefits of integrating Jira Workflow with other tools:

### Improved Collaboration

Integrating JiraWorkflow with other tools can improve collaboration among team members. For example, integrating Jira Workflow with Confluence allows team members to create and share documents easily.

### Streamlined Workflows

Integrating Jira Workflow with other tools can help streamline workflows. For example, integrating Jira Workflow with Bitbucket allows teams to manage code changes and track issues in a single platform.

Jira Workflow Reporting and Analytics

JiraWorkflow provides reporting and analytics features that allow teams to monitor progress and identify issues quickly. Here are some of the most useful reporting and analytics features:

### Dashboards

JiraWorkflow allows you to create custom dashboards that show key metrics, such as issue status, team performance, and project progress.

### Reports

JiraWorkflow provides a wide range of reports, including burndown charts, velocity charts, and sprint reports. These reports can help teams identify issues and improve performance.

### Custom Fields

JiraWorkflow allows you to create custom fields that capture additional information about issues. This can help teams track data that is specific to their project or industry.

Conclusion

JiraWorkflow is a powerful tool that can help Agile teams achieve their goals. Its customizable workflows, real-time tracking and reporting features, and integration with other tools make it an essential tool for Agile project management. By following the best practices outlined in this article and customizing JiraWorkflow to meet your team’s unique needs, you can take your project management to the next level.

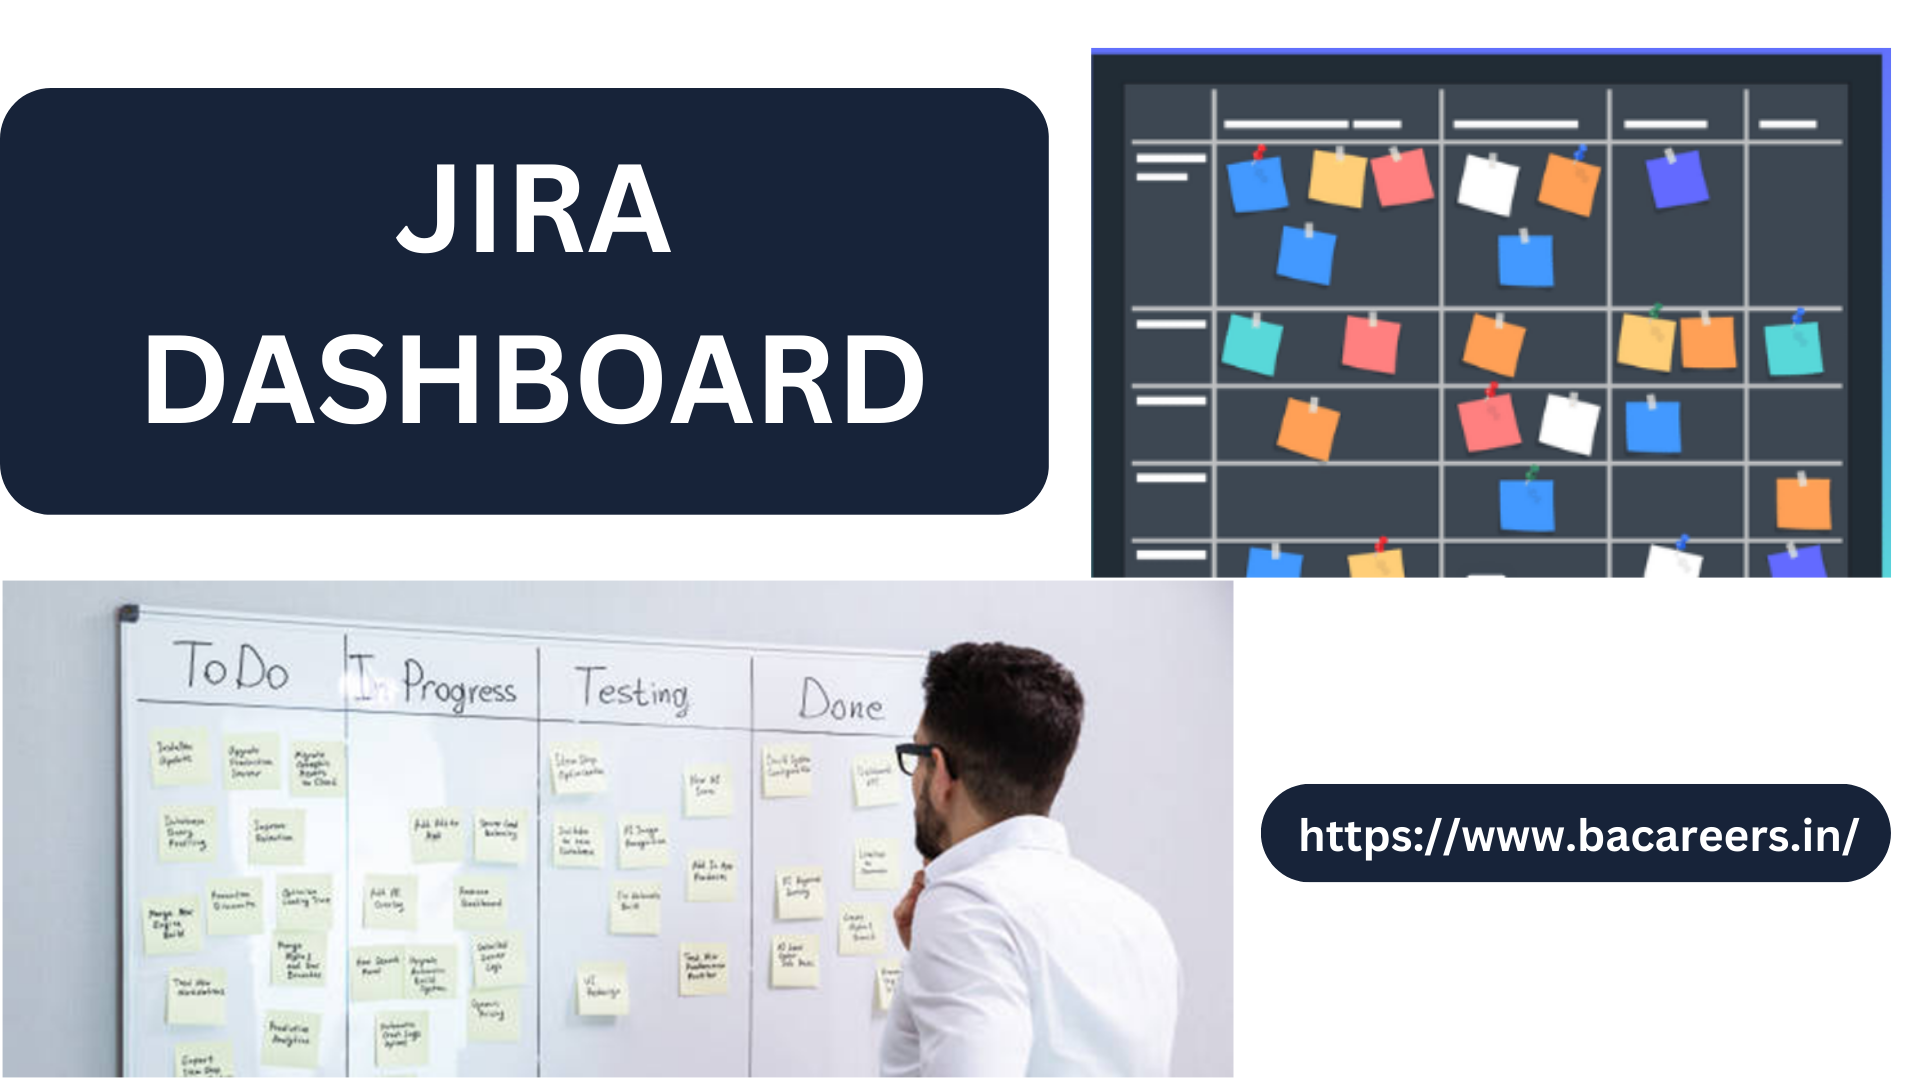
Jira Dashboard: The Ultimate Tool for Agile Project Management

Managing Agile Projects with Ease: Jira Tool Explained

From Planning to Execution: How Jira Software Can Help You Deliver Successful Projects

Jira Dashboard: The Ultimate Tool for Agile Project Management

Are you tired of managing your agile projects using multiple tools and struggling to keep track of everything? Look no further than Jira Dashboard, the ultimate tool for agile project management. With its customizable and user-friendly interface, Jira Dashboard allows you to easily track your team’s progress, manage tasks, and collaborate with your team in real-time. By providing a centralized location for all project-related information, Jira Dashboard streamlines your workflow and helps you stay on top of deadlines. Plus, with its powerful reporting and analytics capabilities, you can gain valuable insights into your team’s performance and identify areas for improvement. Whether you’re a software development team or a marketing agency, Jira Dashboard is the perfect solution to take your agile project management to the next level. So why wait? Start using Jira Dashboard today and watch your productivity soar!

Jira Dashboard
 

What is Jira Dashboard?

JiraDashboard is a web-based project management tool developed by Atlassian. It is widely used by software development teams, marketing agencies, and other organizations for managing agile projects. Jira Dashboard provides a centralized location for all project-related information, including tasks, bugs, issues, and deadlines. It allows you to easily manage your team’s workload, track progress, and collaborate with your team in real-time. Jira Dashboard is a highly customizable tool that can be tailored to fit your specific project management needs.

Benefits of using Jira Dashboard for Agile Project Management

Jira Dashboard offers numerous benefits for agile project management. Firstly, it provides a centralized location for all project-related information, allowing you to easily track progress, manage tasks, and collaborate with your team in real-time. This streamlines your workflow and eliminates the need for multiple tools. Secondly, JiraDashboard is highly customizable, allowing you to tailor it to fit your specific project management needs. You can create custom boards, workflows, and fields to fit your team’s workflow. Thirdly, JiraDashboard provides powerful reporting and analytics capabilities, giving you valuable insights into your team’s performance and identifying areas for improvement. Lastly, Jira Dashboard integrates seamlessly with other tools for agile project management, such as Bitbucket, Confluence, and Trello.

Key Features of Jira Dashboard

JiraDashboard offers a wide range of features to help you manage your agile projects efficiently. Some of the key features include:

– Customizable boards: You can create custom boards for your team to manage tasks, bugs, and issues. You can also customize the columns, swimlanes, and filters to fit your team’s workflow.

– Agile reporting: Jira Dashboard provides powerful reporting and analytics capabilities, allowing you to track progress, identify bottlenecks, and measure team performance.

– Custom workflows: You can create custom workflows to fit your team’s workflow. You can define the status, transitions, and triggers for each workflow.

– Custom fields: You can create custom fields to capture additional information about tasks, bugs, and issues. You can define the type, options, and default value for each field.

– Real-time collaboration: Jira Dashboard allows you to collaborate with your team in real-time. You can comment on tasks, mention team members, and attach files to tasks.

Customizing your Jira Dashboard

JiraDashboard is a highly customizable tool that can be tailored to fit your specific project management needs. You can customize your JiraDashboard in several ways, including:

– Customizing boards: You can create custom boards for your team to manage tasks, bugs, and issues. You can also customize the columns, swimlanes, and filters to fit your team’s workflow.

– Customizing workflows: You can create custom workflows to fit your team’s workflow. You can define the status, transitions, and triggers for each workflow.

– Adding custom fields: You can create custom fields to capture additional information about tasks, bugs, and issues. You can define the type, options, and default value for each field.

– Creating custom dashboards: You can create custom dashboards to display the information you need. You can add gadgets, filters, and charts to your dashboard.

Creating and Managing Boards in JiraDashboard

Jira Dashboard allows you to create and manage boards for your team to manage tasks, bugs, and issues. To create a board, you need to follow these steps:

  1. Go to the Boards tab in Jira Dashboard.
  2. Click on the Create Board button.
  3. Select the type of board you want to create (Scrum or Kanban).
  4. Choose the project and the filter you want to use for your board.
  5. Customize the columns, swimlanes, and filters for your board.
  6. Save your board.

To manage boards in Jira Dashboard, you can do the following:

  1. Edit the columns, swimlanes, and filters for your board.
  2. Add or remove team members from your board.
  3. Change the board’s settings, such as permissions and notifications.
  4. Archive or delete the board if it is no longer needed.

Using Jira Dashboard for Sprint Planning and Backlog Refinement

JiraDashboard is a great tool for sprint planning and backlog refinement. You can use JiraDashboard to plan sprints and prioritize tasks based on their importance. To plan a sprint, you need to follow these steps:

  1. Create a new sprint in Jira Dashboard.
  2. Add tasks to the sprint.
  3. Prioritize tasks based on their importance.
  4. Assign tasks to team members.
  5. Set the sprint duration and start date.
  6. Save the sprint.

To refine your backlog, you can use JiraDashboard to prioritize tasks, add or remove tasks, and estimate the time and effort required for each task.

Tracking Progress and Performance with JiraDashboard

JiraDashboard provides powerful reporting and analytics capabilities, allowing you to track progress, identify bottlenecks, and measure team performance. You can use Jira Dashboard to generate reports on:

– Burndown charts: A burndown chart shows the remaining work for a sprint or a project.

– Velocity charts: A velocity chart shows the team’s velocity over time.

– Cumulative flow diagrams: A cumulative flow diagram shows how work is progressing through the workflow.

– Control charts: A control chart shows the team’s performance over time.

These reports can help you identify areas for improvement, such as bottlenecks and low-performing team members.

Integrating Jira Dashboard with other tools for Agile Project Management

JiraDashboard integrates seamlessly with other tools for agile project management, such as Bitbucket, Confluence, and Trello. You can use Bitbucket to manage your source code, Confluence to create and share project documentation, and Trello to manage your team’s tasks and projects. These tools can be integrated with Jira Dashboard to create a seamless workflow.

Jira Dashboard Best Practices

To get the most out of Jira Dashboard, you should follow these best practices:

– Keep your boards and workflows simple and easy to use.

– Define clear roles and responsibilities for each team member.

– Prioritize tasks based on their importance.

– Use Jira Dashboard for real-time collaboration and communication.

– Use Jira Dashboard’s reporting and analytics capabilities to identify areas for improvement.

Conclusion

JiraDashboard is the ultimate tool for agile project management. With its customizable and user-friendly interface, JiraDashboard allows you to easily track your team’s progress, manage tasks, and collaborate with your team in real-time. By providing a centralized location for all project-related information, JiraDashboard streamlines your workflow and helps you stay on top of deadlines. Plus, with its powerful reporting and analytics capabilities, you can gain valuable insights into your team’s performance and identify areas for improvement. Whether you’re a software development team or a marketing agency, JiraDashboard is the perfect solution to take your agile project management to the next level. So why wait? Start using JiraDashboard today and watch your productivity.

What is Jira ?

From Planning to Execution: How Jira Software Can Help You Deliver Successful Projects

Managing Agile Projects with Ease: Jira Tool Explained

Managing Agile Projects with Ease: Jira Tool Explained

Agile project management has become increasingly popular in recent years, thanks to its flexibility, adaptability, and efficiency. But managing agile projects can be a daunting task, especially if you don’t have the right tools to help you stay organized and on track. That’s where Jira comes in. Jira is a powerful project management tool that can help you manage your agile projects with ease. From creating and assigning tasks to tracking progress and collaborating with your team, Jira has everything you need to stay on top of your projects and deliver results. In this article, we’ll explore the ins and outs of Jira and how it can help you manage your agile projects more effectively. Whether you’re a seasoned project manager or just starting out, Jira is a tool that you won’t want to overlook. So, let’s dive in and see what Jira has to offer!

  1. What is Jira and how it supports Agile project management?
  2. Benefits of using Jira for Agile project management
  3. Understanding the Jira interface
  4. Creating a project in Jira
  5. Creating and managing Agile boards in Jira
  6. Creating and managing sprints in Jira
  7. Managing issues and tasks in Jira
  8. Integrating Jira with other Agile tools
  9. Best practices for using Jira for Agile project management
  10. Conclusion

jira tool
jira tool

What is Jira and how it supports Agile project management?

Jira is a project management tool that allows teams to plan, track, and manage their projects. It was developed by Atlassian and is used by thousands of organizations worldwide. Jira supports agile project management by providing teams with a range of features to help them work collaboratively and manage their work effectively.

One of the key features of Jira is its flexibility. The tool can be customized to support different agile methodologies such as Scrum, Kanban, and Lean. Jira allows teams to create and manage agile boards, which can be used to visualize the progress of the project. The boards can be customized to display the information that is most relevant to the team.

Jira also provides teams with a range of tools to help them manage their work. Teams can create and manage issues, which can be used to track tasks, bugs, and other work items. Issues can be assigned to team members, and progress can be tracked using a range of metrics. Jira also provides teams with a range of reports, which can be used to monitor progress and identify areas for improvement.

Benefits of using Jira for Agile project management

Jira provides teams with a range of benefits when it comes to managing agile projects. One of the key benefits of using Jira is that it provides teams with a flexible platform to plan, track, and manage their projects. Jira can be customized to support different agile methodologies, which means that teams can use the tool in a way that works best for them.

Another benefit of using Jira is that it provides teams with a range of tools to help them manage their work. Teams can create and manage issues, which can be used to track tasks, bugs, and other work items. Issues can be assigned to team members, and progress can be tracked using a range of metrics. Jira also provides teams with a range of reports, which can be used to monitor progress and identify areas for improvement.

Jira also provides teams with a range of collaboration tools that enable them to work more effectively together. Teams can use Jira to share documents, communicate with team members, and collaborate on work items. This helps to ensure that everyone is working towards the same goals and that the project is progressing as planned.

Understanding the Jira interface

The Jira interface can be daunting for new users, but it is easy to navigate once you understand how it works. The interface is divided into different sections, each of which provides access to different features of the tool.

The main section of the interface is the project dashboard. The dashboard provides an overview of the project and displays key metrics such as the number of issues, the number of completed tasks, and the progress of the project.

The sidebar provides access to different features of the tool such as issues, boards, sprints, and reports. Users can navigate between these features by clicking on the relevant item in the sidebar.

The top menu bar provides access to other features of the tool such as search, filters, and user management. Users can access these features by clicking on the relevant item in the menu bar.

Creating a project in Jira

Creating a project in Jira is easy. To create a new project, you need to have administrator access to Jira. Once you have access, you can create a new project by following these steps:

  1. Click on the “Projects” link in the sidebar.
  2. Click on the “Create project” button.
  3. Select the type of project you want to create.
  4. Enter a name for your project and select a project key.
  5. Select a project template or create a new one.
  6. Click on the “Create” button to create the project.

Once you have created a project, you can start adding issues, creating boards, and managing sprints.

Creating and managing Agile boards in Jira

Agile boards are an essential feature of Jira. Boards allow teams to visualize the progress of their work and track tasks as they move through different stages of development. To create an agile board in Jira, you need to follow these steps:

  1. Click on the “Boards” link in the sidebar.
  2. Click on the “Create board” button.
  3. Select the type of board you want to create.
  4. Enter a name for your board and select a project.
  5. Select the filter that you want to use for your board.
  6. Click on the “Create” button to create the board.

Once you have created a board, you can customize it to display the information that is most relevant to your team. You can add columns, rearrange the order of the columns, and add filters to control the information that is displayed.

Creating and managing sprints in Jira

Sprints are an essential part of agile project management. Sprints are timeboxed iterations of work that allow teams to focus on delivering a specific set of features or functionality. To create a sprint in Jira, you need to follow these steps:

  1. Click on the “Active sprints” link in the sidebar.
  2. Click on the “Create sprint” button.
  3. Enter a name for your sprint and select the start and end dates.
  4. Select the issues that will be included in the sprint.
  5. Click on the “Create” button to create the sprint.

Once you have created a sprint, you can start working on the tasks that are included in the sprint. You can track progress using the agile board, and you can update the status of tasks as they are completed.

Managing issues and tasks in Jira

Issues and tasks are the building blocks of agile project management. Jira provides teams with a range of tools to help them manage their work, including issues and tasks. To create an issue in Jira, you need to follow these steps:

  1. Click on the “Issues” link in the sidebar.
  2. Click on the “Create issue” button.
  3. Select the project that the issue will belong to.
  4. Enter a summary and description for the issue.
  5. Assign the issue to a team member.
  6. Click on the “Create” button to create the issue.

Once you have created an issue, you can start working on the task. You can update the status of the issue as it moves through different stages of development. You can also add comments, attachments, and other details to the issue to provide context and information.

Integrating Jira with other Agile tools

Jira can be integrated with a range of other agile tools to provide teams with additional functionality and support. Some of the most popular integrations include:

– Confluence: Confluence is a collaboration tool that allows teams to create and share documents, knowledge bases, and other resources. Jira and Confluence can be integrated to provide a seamless experience for teams, allowing them to work more effectively together.

– Bitbucket: Bitbucket is a code hosting and collaboration tool that allows teams to manage their code repositories. Jira and Bitbucket can be integrated to provide a complete software development solution, allowing teams to manage their code, issues, and tasks in one place.

– Slack: Slack is a communication tool that allows teams to collaborate and communicate in real-time. Jira and Slack can be integrated to provide teams with notifications and updates on their work, allowing them to stay up-to-date with the progress of the project.

Best practices for using Jira for Agile project management

To get the most out of Jira for agile project management, it’s important to follow some best practices. Here are some tips to help you get started:

– Customize Jira to support your agile methodology. Jira can be customized to support different agile methodologies, so make sure that you set up the tool to work in a way that supports your team’s approach.

– Use boards to visualize progress. Boards are an essential feature of Jira, so make sure that you use them to visualize the progress of your work and track tasks as they move through different stages of development.

– Keep issues up-to-date. It’s important to keep issues up-to-date and to update the status of tasks as they are completed. This helps to ensure that everyone is working towards the same goals and that the project is progressing as planned.

– Use reports to track progress. Jira provides teams with a range of reports that can be used to track progress and identify areas for improvement. Make sure that you use these reports to monitor progress and identify any issues that need to be addressed.

Conclusion

Jira is a powerful project management tool that provides teams with the flexibility, adaptability, and efficiency they need to manage their agile projects effectively. The tool supports agile methodologies such as Scrum, Kanban, and Lean, and provides teams with a range of features to help them work collaboratively and manage their work effectively. By following best practices and using the tool to its full potential, teams can ensure that their agile projects are delivered on time and to the highest standard. If you’re looking for a tool to manage your agile projects, Jira is definitely worth considering.

Gantt Charts: Enhancing Project Efficiency and Collaboration

The Power of Gantt Charts: Enhancing Project Efficiency and Collaboration

When it comes to project management, efficiency and collaboration are key. Without proper planning and organization, even the simplest of projects can quickly become overwhelming and chaotic. That’s where Gantt charts come in. These visual tools have been around for over a century, but they remain one of the most effective ways to plan, track, and manage projects. By breaking down complex tasks into smaller, more manageable components, Gantt charts allow project managers to see the big picture and keep their team on track. But Gantt charts aren’t just useful for project managers. They also help team members stay on the same page and collaborate more effectively. In this article, we’ll explore the power of Gantt charts and how they can enhance project efficiency and collaboration. Whether you’re a seasoned project manager or a newcomer to the field, there’s something here for everyone. So let’s dive in!

Topics Covered

  1. What is a Gantt chart?
  2. Benefits of using Gantt charts for project management
  3. History of Gantt charts
  4. How to create a Gantt chart
  5. Common features of Gantt charts
  6. Tips for using Gantt charts effectively
  7. Gantt charts for team collaboration
  8. Gantt chart software options
  9. Gantt chart templates and examples
  10. Conclusion

gantt charts
gantt charts

What is a Gantt chart?

A Gantt chart is a horizontal bar chart that provides a visual representation of a project schedule. The chart consists of a series of horizontal bars, each representing a task or activity required to complete the project. The length of each bar represents the duration of the task, and the position of the bar on the chart shows when the task will begin and end. Gantt charts typically include a timeline along the top or bottom of the chart, showing the overall duration of the project.

Gantt charts can be used to plan and track projects of any size or complexity. They help project managers and team members stay organized and on track, by breaking down complex projects into smaller, more manageable tasks. By providing a visual representation of the project schedule, Gantt charts make it easy to see how each task fits into the overall project timeline, and to identify potential scheduling conflicts or delays.

Gantt charts are also highly customizable, allowing project managers to add additional information to each task, such as task dependencies, resource requirements, and progress status.

Benefits of using Gantt charts for project management

There are many benefits to using Gantt charts for project management. Here are just a few:

### 1. Improved planning and organization

Gantt charts allow project managers to break down complex projects into smaller, more manageable tasks, making it easier to plan and organize the project schedule. By identifying the individual tasks required to complete the project, project managers can better allocate resources, schedule tasks, and identify potential bottlenecks or delays.

### 2. Enhanced communication and collaboration

Gantt charts provide a visual representation of the project schedule, making it easier for team members to understand the overall project timeline and their individual roles and responsibilities. By keeping everyone on the same page, Gantt charts can help improve communication and collaboration among team members.

### 3. Better resource allocation

Gantt charts allow project managers to identify resource requirements for each task, making it easier to allocate resources effectively. By understanding the resource requirements for each task, project managers can ensure that resources are available when needed, and avoid overloading team members with too many tasks at once.

### 4. Improved time management

Gantt charts provide a clear visual representation of the project schedule, making it easier to manage time effectively. By identifying potential scheduling conflicts or delays, project managers can take proactive steps to ensure that tasks are completed on time, and that the project stays on track.

### 5. Greater flexibility and adaptability

Gantt charts are highly customizable, allowing project managers to add or remove tasks as needed, and to adjust the project schedule in response to changing circumstances. This flexibility and adaptability can be especially valuable in complex projects, where unforeseen obstacles or delays can arise.

History of Gantt charts

Gantt charts were first developed by an American engineer named Henry Gantt in the early 20th century. Gantt was a disciple of Frederick Taylor, the founder of scientific management, and was interested in finding ways to improve the efficiency of industrial production.

Gantt developed his chart as a way to visualize the production schedule for a manufacturing plant. His chart consisted of a series of horizontal bars, each representing a different stage of the production process, and was designed to help managers identify potential bottlenecks or delays in the production process.

Gantt’s chart quickly gained popularity in the manufacturing industry, and was soon adopted by project managers in other industries as well. Today, Gantt charts are used in a wide variety of industries and applications, from construction and engineering to software development and marketing.

How to create a Gantt chart

Creating a Gantt chart is relatively simple, and can be done using a variety of software tools. Here are the basic steps:

### 1. Identify the tasks required to complete the project

The first step in creating a Gantt chart is to identify the individual tasks required to complete the project. This can be done by breaking down the project into smaller, more manageable components, and identifying the individual tasks required to complete each component.

### 2. Determine the duration of each task

Once the tasks have been identified, the next step is to determine the duration of each task. This can be done by estimating the amount of time required to complete each task, based on past experience, expert opinions, or other sources of information.

### 3. Determine the order of the tasks

Once the duration of each task has been determined, the next step is to determine the order in which the tasks should be completed. This can be done by identifying any dependencies between tasks, and determining which tasks must be completed before others can begin.

### 4. Create the Gantt chart

Once the tasks, durations, and dependencies have been identified, the Gantt chart can be created. This can be done using a variety of software tools, including Microsoft Excel, Microsoft Project, or specialized Gantt chart software.

Common features of Gantt charts

While Gantt charts can be highly customizable, there are several common features that are found in most Gantt charts. These include:

### 1. Task bars

The task bars are the horizontal bars that represent each task on the Gantt chart. The length of each bar represents the duration of the task, and the position of the bar on the chart shows when the task will begin and end.

### 2. Timeline

The timeline shows the overall duration of the project, and is typically displayed along the top or bottom of the chart.

### 3. Milestones

Milestones are significant events or achievements in the project schedule, such as the completion of a major task or the delivery of a key deliverable. Milestones are often represented on the Gantt chart by vertical lines or diamonds.

### 4. Task dependencies

Task dependencies show the relationships between tasks, and indicate which tasks must be completed before others can begin. Task dependencies are typically represented on the Gantt chart by arrows or other connectors.

### 5. Resource allocation

Resource allocation shows the resources required for each task, such as personnel, equipment, or materials. Resource allocation is often represented on the Gantt chart by color coding or other visual cues.

Tips for using Gantt charts effectively

While Gantt charts can be a powerful tool for project management, there are several tips to keep in mind to ensure that they are used effectively. Here are a few:

### 1. Keep the chart up to date

Gantt charts are only effective if they accurately reflect the current status of the project. To ensure that the chart remains up to date, it’s important to update it regularly, and to communicate any changes or delays to team members as soon as possible.

### 2. Use clear and concise task descriptions

To ensure that team members understand what is expected of them, it’s important to use clear and concise task descriptions on the Gantt chart. Task descriptions should be specific and actionable, and should clearly define the scope and requirements of each task.

### 3. Identify critical path tasks

The critical path is the sequence of tasks that must be completed on time in order for the project to be completed on schedule. By identifying critical path tasks on the Gantt chart, project managers can focus their attention on these tasks, and take proactive steps to ensure that they are completed on time.

### 4. Use color coding to highlight key information

Color coding can be a useful way to highlight key information on the Gantt chart, such as task dependencies or resource allocation. By using different colors or shading for different types of information, team members can quickly and easily understand the key elements of the project schedule.

### 5. Use Gantt charts for team meetings and communication

Gantt charts can be a powerful tool for team meetings and communication. By using the chart to facilitate discussions about the project schedule and progress, team members can stay engaged and on track, and can work together more effectively to complete the project.

Gantt charts for team collaboration

While Gantt charts are often associated with project management, they can also be a powerful tool for team collaboration. By providing a visual representation of the project schedule, Gantt charts can help team members understand how their individual tasks fit into the overall project, and can help them stay on track and focused on their goals.

Gantt charts can also help team members identify potential scheduling conflicts or delays, and can facilitate discussions about how to overcome these obstacles. By keeping everyone on the same page, Gantt charts can help improve communication and collaboration among team members, and can help ensure that the project is completed on time and within budget.

Gantt charts software options

There are many software options available for creating Gantt charts, including:

### 1. Microsoft Excel

Microsoft Excel is a popular option for creating Gantt charts, thanks to its built-in charting capabilities and ease of use.

### 2. Microsoft Project

Microsoft Project is a more powerful project management tool that includes Gantt chart functionality and a range of other project management features.

### 3. Smartsheet

Smartsheet is a cloud-based project management tool that includes Gantt chart functionality, as well as a range of other project management features.

### 4. Trello

Trello is a popular project management tool that includes a range of visual task management features, including the ability to create Gantt charts.

### 5. Asana

Asana is a powerful project management tool that includes Gantt chart functionality, as well as a range of other project management features.

Gantt chart templates and examples

There are many Gantt chart templates and examples available online, which can be a useful starting point for creating your own Gantt chart. Here are a few resources to get you started:

### 1. Microsoft Office templates

Microsoft offers a range of Gantt chart templates for Excel and other Office applications, which can be customized to meet your specific needs.

### 2. Smartsheet templates

Smartsheet offers a range of Gantt chart templates, as well as other project management templates and resources.

### 3. ProjectManager.com

ProjectManager.com offers a range of project management resources, including Gantt chart templates and examples.

### 4. GanttProject

GanttProject is a free, open-source Gantt chart software tool that includes a range of templates and examples.

### 5. TeamGantt

TeamGantt is a cloud-based project management tool that includes a range of Gantt chart templates and examples.

Conclusion

GanttCharts are a powerful tool for project management and team collaboration. By breaking down complex projects into smaller, more manageable tasks, GanttCharts allow project managers to plan and track projects more effectively, and help team members stay on the same page and work together more efficiently. Whether you’re a seasoned project manager or a newcomer to the field, there’s something here for everyone. So why not give Gantt charts a try, and see how they can help enhance your project efficiency and collaboration?

Expert Tips for Effective Remote Project Management

Expert Tips for Effective Remote Project Management

In today’s fast-paced business world, remote project management has become a necessity. With the rise of remote work and the need for flexibility, it’s essential for project managers to have the skills and tools necessary to manage projects from afar. However, managing virtual teams can be challenging, and keeping everyone on track and engaged can be difficult without the right strategies in place. That’s where expert tips for effective remote ProjectManagement come in. Whether you’re a seasoned project manager or new to the field, these tips can help you manage your team effectively, collaborate efficiently, and deliver successful projects on time, every time. From communication strategies to project management software, there are a variety of tools and tactics that can help you succeed in managing remote teams. In this article, we’ll explore some of the best expert tips for effective remote project management and how you can implement them in your own projects.

Topics Covered in this Article

  1. What is remote project management?
  2. Benefits of remote project management
  3. Remote project management statistics
  4. Challenges of remote project management
  5. Tips for effective remote project management
  6. Tools for remote project management
  7. Best practices for remote project management
  8. Communication strategies for remote project management
  9. Remote project management success stories
  10. Conclusion

project management

What is remote project management?

Remote project management is the process of managing projects from afar. This can involve managing virtual teams, coordinating with remote team members, and collaborating on projects using online tools and software. Remote ProjectManagement allows for greater flexibility and can be a more cost-effective way to manage projects, as it eliminates the need for physical office space and allows team members to work from anywhere in the world. With the rise of remote work, remote ProjectManagement has become increasingly important for businesses of all sizes.

Remote project management can involve a variety of tasks and responsibilities, including project planning, team coordination, resource allocation, and risk management. Successful remote project management requires strong communication skills, effective collaboration tools, and a keen understanding of ProjectManagement principles.

Benefits of remote project management

Remote project management offers a number of benefits, including:

  1. **Flexibility:** Remote project management allows team members to work from anywhere in the world, providing greater flexibility and work-life balance.
  2. **Cost-effectiveness:** Remote project management eliminates the need for physical office space and can be a more cost-effective way to manage projects.
  3. **Increased productivity:** Remote team members can work without the distractions of a physical office, leading to increased productivity and efficiency.
  4. **Access to a wider talent pool:** Remote project management allows businesses to tap into a wider talent pool, as team members can be located anywhere in the world.
  5. **Reduced travel time:** With remote project management, team members can collaborate on projects without the need for travel, reducing travel time and expenses.

Remote project management statistics

Remote work is on the rise, and remote project management is becoming increasingly important for businesses. According to a report by Buffer, 98% of remote workers would like to work remotely at least some of the time for the rest of their careers. Additionally, 57% of remote workers say they are more productive when working remotely. Another report by Owl Labs found that companies that allow remote work have a 25% lower employee turnover rate than those that don’t.

Challenges of remote ProjectManagement

While remote project management offers many benefits, it also presents a number of challenges. Some of the most common challenges of remote ProjectManagement include:

  1. **Communication:** Communication can be more difficult when working remotely, as team members may be located in different time zones and have different communication preferences.
  2. **Collaboration:** Collaborating on projects can be more challenging when working remotely, as team members may not have access to the same tools and resources.
  3. **Motivation and engagement:** Keeping team members motivated and engaged can be more difficult when working remotely, as team members may feel isolated or disconnected from the rest of the team.
  4. **Trust:** Building trust between team members can be more difficult when working remotely, as team members may not have the same opportunities to build relationships and rapport with each other.

Tips for effective remote ProjectManagement

To overcome the challenges of remote ProjectManagement and ensure success, there are a number of expert tips that can help. Some of the best tips for effective remote ProjectManagement include:

  1. **Establish clear communication channels:** Clear communication is essential for remote project management. Establish clear communication channels, such as email, instant messaging, and video conferencing, and ensure that all team members understand how to use them effectively.
  2. **Set clear expectations and goals:** Set clear expectations and goals for the project, including timelines, deliverables, and milestones. Ensure that all team members understand their roles and responsibilities and have the resources they need to succeed.
  3. **Use project management software:** ProjectManagement software, such as Trello, Asana, or Basecamp, can help you manage remote teams more effectively. These tools allow you to track progress, assign tasks, and collaborate on projects in real-time.
  4. **Schedule regular check-ins:** Schedule regular check-ins with team members to ensure that everyone is on track and to address any issues or concerns that arise. These check-ins can be done via video conferencing or instant messaging.
  5. **Encourage collaboration and teamwork:** Encourage collaboration and teamwork among remote team members. Use online collaboration tools, such as Google Docs or Slack, to facilitate communication and collaboration on projects.
  6. **Provide regular feedback:** Provide regular feedback to team members, both positive and constructive, to help them improve and stay motivated. Use video conferencing or instant messaging to provide feedback in real-time.
  7. **Build relationships and trust:** Building relationships and trust between remote team members is essential for success. Use video conferencing and other online tools to facilitate team-building activities and foster a sense of community among remote team members.

Tools for remote ProjectManagement

There are a variety of tools and software available to help you manage remote teams more effectively. Some of the best tools for remote ProjectManagement include:

  1. **Trello:** Trello is a project management tool that allows you to create boards, lists, and cards to organize and prioritize tasks. It also allows you to collaborate with team members in real-time and track progress on projects.
  2. **Asana:** Asana is a project management tool that allows you to create tasks, assign them to team members, and track progress in real-time. It also includes a variety of collaboration features, such as commenting, file sharing, and team messaging.
  3. **Basecamp:** Basecamp is a project management tool that allows you to manage projects, assign tasks, and collaborate with team members. It also includes features such as scheduling, file sharing, and team messaging.
  4. **Slack:** Slack is a team messaging tool that allows you to communicate with team members in real-time. It includes features such as channels, direct messaging, and file sharing.
  5. **Google Docs:** Google Docs is a collaboration tool that allows you to create and share documents, spreadsheets, and presentations in real-time. It also includes commenting and collaboration features, such as suggesting edits and tracking changes.

Best practices for remote ProjectManagement

To ensure success in remote ProjectManagement, there are a number of best practices that you should follow. Some of the best practices for remote project management include:

  1. **Communicate regularly:** Regular communication is essential for remote project management. Schedule regular check-ins with team members and use online communication tools to stay in touch.
  2. **Be flexible:** Remote work requires flexibility. Be open to new ideas and approaches and be willing to adjust your plans as needed.
  3. **Set clear expectations:** Set clear expectations and goals for the project and ensure that all team members understand their roles and responsibilities.
  4. **Encourage collaboration and teamwork:** Encourage collaboration and teamwork among remote team members, using online collaboration tools and team-building activities.
  5. **Provide regular feedback:** Provide regular feedback to team members to help them improve and stay motivated.
  6. **Use project management software:** Use ProjectManagement software to track progress, assign tasks, and collaborate on projects in real-time.
  7. **Build relationships and trust:** Building relationships and trust between remote team members is essential for success. Use video conferencing and other online tools to facilitate team-building activities and foster a sense of community among remote team members.

Communication strategies for remote ProjectManagement

Effective communication is essential for success in remote project management. To ensure that your communication strategies are effective, there are a number of best practices that you should follow. Some of the best communication strategies for remote ProjectManagement include:

  1. **Establish clear communication channels:** Establish clear communication channels, such as email, instant messaging, and video conferencing, and ensure that all team members understand how to use them effectively.
  2. **Use video conferencing:** Use video conferencing to facilitate face-to-face communication and build relationships between remote team members.
  3. **Be concise:** Be concise in your communication, using clear and simple language to convey your message.
  4. **Listen actively:** Listen actively to team members and ensure that their concerns and ideas are heard and understood.
  5. **Be responsive:** Be responsive to team members, responding to their messages and inquiries in a timely manner.
  6. **Encourage open communication:** Encourage open communication among team members, fostering an environment of transparency and honesty.

Remote ProjectManagement success stories

Remote ProjectManagement has been successful for many businesses and organizations. For example, Automattic, the company behind WordPress, is a fully remote company with over 1,000 employees located in more than 70 countries. The company has been able to successfully manage projects and collaborate on software development using remote ProjectManagement strategies. Another example is the software company GitLab, which is also fully remote and has over 1,300 employees located around the world. The company has been able to successfully manage projects and collaborate on software development using a combination of communication tools and ProjectManagement software.

Conclusion

Remote project management is becoming increasingly important for businesses of all sizes. By following expert tips and best practices, using the right tools and software, and fostering strong communication and collaboration among remote team members, you can successfully manage projects from afar. Whether you’re a seasoned project manager or new to the field, these tips can help you manage your team effectively, collaborate efficiently, and deliver successful projects on time, every time.

Who is project Manager & what they do?

The Benefits of Using RACI in Teamwork and Collaboration

The Benefits of Using RACI in Teamwork and Collaboration

In today’s fast-paced business world, teamwork and collaboration are essential for achieving success. However, managing team roles and responsibilities can be a challenging task. This is where RACI comes in – a powerful tool that can help streamline collaboration and improve efficiency. RACI stands for Responsible, Accountable, Consulted, and Informed. It is a simple yet effective framework that helps define and clarify roles and responsibilities within a team. By using RACI, teams can avoid confusion, minimize duplication of effort, and ensure that everyone is working towards the same goals. In this article, we will explore the benefits of using RACI in teamwork and collaboration, and how it can help bring your team’s performance to the next level. Whether you’re a project manager, team leader, or a team member, understanding and implementing RACI can make a significant impact on your team’s success. So, let’s dive in and explore the world of RACI!

RACI

What is RACI?

RACI is a framework that helps define and clarify roles and responsibilities within a team. It stands for Responsible, Accountable, Consulted, and Informed. Each of these terms represents a different level of involvement that a team member can have in a project or task.

– **Responsible** – This person is responsible for completing the task or project. They are the ones who will do the work and ensure that it is completed on time and to the required standard.

– **Accountable** – This person is responsible for the overall success of the project or task. They are the ones who will be held accountable if the project fails to meet its objectives.

– **Consulted** – This person is consulted for their expertise or input on a project or task. They can provide valuable insights and feedback that can help improve the quality of the work.

– **Informed** – This person is kept informed about the progress of the project or task. They are not directly involved in the work but need to be aware of its status.

By assigning each team member a specific RACI role, everyone knows what is expected of them and can work together more efficiently.

The History of RACI

The RACI framework was first introduced in the 1970s by the consulting firm Booz Allen Hamilton. It was originally developed as a way to help organizations manage their internal controls and ensure compliance with regulations. However, it quickly gained popularity as a project management tool and is now widely used in a variety of industries and settings.

Over the years, the RACI framework has evolved and been adapted to meet the needs of different organizations. Today, it is considered one of the most effective ways to manage team roles and responsibilities.

The Benefits of Using RACI in Teamwork and Collaboration

Using RACI in teamwork and collaboration offers several benefits that can help improve team performance and drive success. Here are some of the key benefits of using RACI:

### Clarity and Accountability

One of the biggest benefits of using RACI is that it provides clarity and accountability. By assigning specific roles and responsibilities to each team member, everyone knows what is expected of them and can work together more efficiently. This helps to avoid confusion and minimize duplication of effort, which can be a common problem in team environments.

Moreover, RACI helps to create a culture of accountability. Each team member knows what they are responsible for and what they will be held accountable for. This can help to motivate team members to perform at their best and take ownership of their work.

### Improved Communication and Collaboration

Another benefit of using RACI is that it improves communication and collaboration. By defining and clarifying roles and responsibilities, team members can communicate more effectively and work together more efficiently. This can help to reduce misunderstandings and conflicts, which can be a common problem in team environments.

Moreover, RACI encourages collaboration by ensuring that everyone is working towards the same goals. By involving team members in the decision-making process and seeking their input and feedback, RACI can help to create a more collaborative and inclusive team environment.

### Increased Efficiency and Productivity

Using RACI can also help to increase efficiency and productivity. By assigning specific roles and responsibilities, team members can focus on their areas of expertise and work more efficiently. This can help to reduce wasted time and effort, which can be a common problem in team environments.

Moreover, RACI helps to eliminate duplication of effort. Since each team member knows what they are responsible for, they can avoid working on the same tasks or projects. This can help to save time and resources and increase overall productivity.

RACI vs Other Delegation Models

While RACI is a popular delegation model, it is not the only one available. Here is a comparison of RACI with other delegation models:

### RACI vs DACI

DACI stands for Driver, Approver, Contributor, and Informed. While similar to RACI, DACI places more emphasis on decision-making. In DACI, the Driver is responsible for making decisions, whereas in RACI, the Accountable person is responsible for overall success.

DACI is often used in small, fast-paced teams where decision-making is critical. However, RACI is more widely used and can be applied to a variety of team environments.

### RACI vs LACE

LACE stands for Leader, Accountable, Consulted, and Executed. It is a delegation model that is often used in healthcare and other highly regulated industries.

While similar to RACI, LACE places more emphasis on leadership and accountability. The Leader is responsible for overall success, whereas in RACI, the Accountable person is responsible.

LACE is often used in highly regulated industries where compliance is critical. However, RACI is more widely used and can be applied to a variety of team environments.

How to Implement RACI in Your Team

Implementing RACI in your team is a relatively straightforward process. Here’s how you can do it:

### Step 1: Identify the Task or Project

The first step is to identify the task or project that you want to assign roles and responsibilities for. It’s important to be specific and clear about what needs to be done and what the goals and objectives are.

### Step 2: Identify the Team Members

The next step is to identify the team members who will be involved in the task or project. It’s important to consider each team member’s skills, expertise, and availability when assigning roles and responsibilities.

### Step 3: Assign Roles and Responsibilities

Once you have identified the task or project and the team members involved, you can assign roles and responsibilities using the RACI framework.

– **Responsible** – Assign one or more team members who will be responsible for completing the task or project.

– **Accountable** – Assign one team member who will be accountable for the overall success of the task or project.

– **Consulted** – Identify team members who will be consulted for their expertise or input on the task or project.

– **Informed** – Identify team members who need to be kept informed about the progress of the task or project.

### Step 4: Communicate Roles and Responsibilities

Once you have assigned roles and responsibilities, it’s important to communicate them to the team members involved. Make sure everyone understands what is expected of them and what their role is in the task or project.

### Step 5: Monitor and Adjust as Necessary

Finally, it’s important to monitor the progress of the task or project and adjust roles and responsibilities as necessary. If a team member is struggling or needs additional support, consider reassigning roles or providing additional training or resources.

Examples of Successful RACI Implementations

RACI has been used successfully in a variety of industries and settings. Here are some examples of successful RACI implementations:

### Healthcare

In healthcare, RACI is often used to manage patient care and ensure compliance with regulations. For example, a hospital might use RACI to assign roles and responsibilities for patient admission, care, and discharge. This can help to ensure that patients receive high-quality care and that regulatory requirements are met.

### IT

In IT, RACI is often used to manage software development projects. For example, a software development team might use RACI to assign roles and responsibilities for coding, testing, and deployment. This can help to ensure that the software is developed on time and to the required standard.

### Marketing

In marketing, RACI is often used to manage campaigns and projects. For example, a marketing team might use RACI to assign roles and responsibilities for content creation, social media management, and analytics. This can help to ensure that marketing campaigns are effective and that the team is working towards the same goals.

Common Mistakes to Avoid When Using RACI

WhileRACI is a powerful tool, there are some common mistakes that teams can make when using it. Here are some mistakes to avoid:

### Confusing Responsible and Accountable

One of the most common mistakes is confusing the roles of Responsible and Accountable. Remember, the Responsible person is responsible for completing the task or project, whereas the Accountable person is responsible for overall success.

### Not Involving the Right People

Another common mistake is not involving the right people in theRACI process. Make sure you consider each team member’s skills, expertise, and availability when assigning roles and responsibilities.

### Not Communicating Roles and Responsibilities

Finally, it’s important to communicate roles and responsibilities to the team members involved. Make sure everyone understands what is expected of them and what their role is in the task or project.

Tools and Software for RACI Implementation

There are several tools and software programs available to help teams implementRACI more efficiently. Here are some popular tools and software programs:

### Trello

Trello is a popular project management tool that can be used to implement RACI. Teams can create boards for specific tasks or projects and assignRACI roles to team members.

### Asana

Asana is another popular project management tool that can be used to implement RACI. Teams can create projects and tasks and assignRACI roles to team members.

### TeamGantt

TeamGantt is a project management tool that specializes in Gantt charts. Teams can create Gantt charts for specific tasks or projects and assignRACI roles to team members.

RACI Training and Certification Programs

If you’re interested in learning more about RACI or becoming certified inRACI, there are several training and certification programs available. Here are some popular programs:

### RACI Training

RACI Training offers online courses and workshops onRACI. These courses cover the basics ofRACI, how to implement it in your team, and how to avoid common mistakes.

### RACI Certification

RACI Certification is an online certification program that tests your knowledge ofRACI. The program includes a series of online courses and a final exam.

Conclusion

In conclusion, RACIis a powerful tool that can help streamline collaboration and improve efficiency in teamwork and collaboration. By assigning specific roles and responsibilities to each team member, everyone knows what is expected of them and can work together more efficiently. Using RACIoffers several benefits, including clarity and accountability, improved communication and collaboration, and increased efficiency and productivity. To implement RACIin your team, identify the task or project, identify the team members, assign roles and responsibilities, communicate roles and responsibilities, and monitor and adjust as necessary. Avoid common mistakes, use tools and software to implement RACImore efficiently, and consider training and certification programs to become an expert inRACI.

Important Articles.

10 Tips for Managing Your Product Backlog Like a Pro

The Importance of a Sprint Backlog in Agile Development

What is a RACI Matrix and How to Use It for Project Management

The RACI matrix is a tool used in project management to clarify roles and responsibilities within a team. It helps to ensure that everyone understands their tasks and how they fit into the overall project. In this post, we’ll explain what the RACI matrix is, how it works, and how it can be used to improve team collaboration and project outcomes.

RACI Matrix
RACI Matrix

What is a RACI matrix?

A RACI matrix is a project management tool that helps to clarify roles and responsibilities within a team. The acronym RACI stands for Responsible, Accountable, Consulted, and Informed. Each task or activity in a project is assigned a RACI code, which indicates who is responsible for completing the task, who is accountable for its success, who needs to be consulted, and who needs to be informed. The RACI matrix helps to ensure that everyone on the team understands their roles and responsibilities, which can improve team collaboration and project outcomes.

How does a RACI matrix work?

A RACI matrix works by assigning a RACI code to each task or activity in a project. The code indicates who is responsible for completing the task (R), who is accountable for its success (A), who needs to be consulted (C), and who needs to be informed (I). By clarifying roles and responsibilities, the RACI matrix helps to improve team collaboration and project outcomes. It ensures that everyone on the team understands their role in the project and can work together effectively to achieve the project goals.

How to create a RACI matrix.

To create a RACImatrix, start by listing all the tasks or activities involved in the project. Then, assign a RACI code to each task or activity. The RACI code should be based on the following criteria:

Responsible (R): Who is responsible for completing the task or activity? This person is the one who will do the work and ensure that it is completed on time and to the required standard.
Accountable (A): Who is accountable for the success of the task or activity? This person is ultimately responsible for ensuring that the task or activity is completed successfully. They may delegate the work to others, but they are still responsible for the outcome.
Consulted (C): Who needs to be consulted before the task or activity can be completed? This person may have valuable input or expertise that is needed to ensure the success of the task or activity.
Informed (I): Who needs to be informed about the progress or outcome of the task or activity? This person may not be directly involved in the task or activity, but they need to be kept up-to-date on its progress or outcome.

Once you have assigned a RACI code to each task or activity, you can use the matrix to clarify roles and responsibilities, improve team collaboration, and ensure project success.

Tips for using a RACI matrix effectively.

To use a RACImatrix effectively, it’s important to ensure that everyone involved in the project understands the roles and responsibilities assigned to them. This can be achieved through clear communication and training. It’s also important to regularly review and update the matrix as the project progresses, to ensure that it remains relevant and accurate. Finally, it’s important to use the matrix as a tool for collaboration and problem-solving, rather than as a rigid set of rules. By using the matrix in this way, you can ensure that everyone is working together towards a common goal and that the project is a success.

Examples of how a RACI matrix can be used in project management.

A RACImatrix can be used in a variety of ways to improve project management and team collaboration. For example, it can be used to clarify roles and responsibilities, ensure that everyone is on the same page, and identify potential areas of conflict or confusion. It can also be used to track progress and ensure that tasks are completed on time and to a high standard. Additionally, it can be used to identify areas where additional resources or support may be needed, and to ensure that everyone is working towards the same goals and objectives. Overall, the RACI matrix is a powerful tool for improving project management and team collaboration, and can be used in a wide range of contexts and situations.

Business Analyst Job Description Explained

Let us discuss in detail what is Business Analyst Job description in this article.

Topics Covered in this Article.

1. Business Analyst Job Description.

2. Key Responsibilities of Business Analyst

  •  Analyze business processes and identify areas for improvement.

  •  Gather and document requirements from stakeholders.

  •   Develop and maintain project plans and timelines.

  •   Conduct feasibility studies and cost-benefit analyses.

  •   Collaborate with cross-functional teams to ensure project success.

3. Important Articles

Analyst Job Description

System Analyst Job Description : If you’re interested in a career as a business analyst, it’s important to understand the job description and responsibilities. A business analyst is responsible for analyzing data, identifying problems, and developing solutions to improve business processes and operations. In this guide, we’ll break down the top 10 responsibilities of a business analyst and provide a detailed overview of the job description.

Analyze business processes and identify areas for improvement.

One of the key responsibilities of a business analyst is to analyze current business processes and identify areas for improvement. This involves gathering data, conducting research, and working with stakeholders to understand the current state of the business. Once areas for improvement have been identified, the business analyst will develop and recommend solutions to address these issues and improve overall business performance. This requires strong analytical skills, attention to detail, and the ability to think critically about complex business problems.

Gather and document requirements from stakeholders.

Another important responsibility of a business analyst is to gather and document requirements from stakeholders. This involves working closely with various departments and individuals within the organization to understand their needs and goals. The business analyst will then document these requirements in a clear and concise manner, ensuring that all stakeholders have a clear understanding of what is needed. This is a critical step in the development of any new business process or system, as it ensures that everyone is on the same page and working towards the same goals.

Develop and maintain project plans and timelines.

A business analyst is responsible for developing and maintaining project plans and timelines. This involves working closely with project managers and other team members to ensure that all tasks are completed on time and within budget. The business analyst will also monitor progress and make adjustments as necessary to ensure that the project stays on track. Effective project planning and management are essential for the success of any business initiative, and the business analyst plays a key role in ensuring that projects are completed on time and within budget.

Conduct feasibility studies and cost-benefit analyses.

One of the key responsibilities of a business analyst is to conduct feasibility studies and cost-benefit analyses. This involves evaluating the potential costs and benefits of a proposed project or initiative, and determining whether it is feasible and financially viable. The business analyst will gather and analyze data, identify potential risks and challenges, and make recommendations to stakeholders based on their findings. This information is critical for decision-making and helps ensure that resources are allocated effectively.

Collaborate with cross-functional teams to ensure project success.

Another important responsibility of a business analyst is to collaborate with cross-functional teams to ensure project success. This involves working closely with stakeholders from different departments and areas of expertise to identify project requirements, develop project plans, and ensure that all parties are aligned and working towards the same goals. The business analyst will also facilitate communication and collaboration between team members, and help resolve any conflicts or issues that arise during the project lifecycle. Effective collaboration is essential for achieving project success and delivering value to the organization.

Important Articles 

Business Analyst Roles and Responsibilities , job description and duties

What is the role of a business analyst in a migration project?

We hope this article helped you to provide overview on Business Analyst Job Description.

error

Enjoy this blog? Please spread the word :)